
DirectX tutorial 9: Particle Effects
Today we’ll work on a subject that can really make a game come to life: particle effects. Explosions, fire, smoke and any other immaterial effects are generally hard to depict correctly, and it would both take a lot of room and would eventually start looking the same over and over if we just stored the effects frame by frame in a video-like manner. Instead we create small images for each effect, which generally have a high transparency, and we then draw a good lot of them clustered in some manner around whatever emits them, and they create the illusion of smoke, fire and so on. Of course they also all move, and the way they move can be very important.
The main idea is that since we already have the sprite in the cache, it’s very fast to draw it a bunch of times, since we skip the loading of it. It is also very small, so we skip the loading of a big image that depicts the entire effect, and since it may be an explosion that if you are close up will stretch outside the screen, the image would have been fairly big, too.
Now, do not expect everything to work out just like that, there are some catches, it is after all too strong a technique to just work like that.
The way we do it is by rendering a point list, with the D3DRS_POINTSPRITEENABLE setting enable (point sprite enable as you see), so it uses the texture and draws the whole of it wherever we specify.
Catch 1: it is not entirely straightforward how sprites scale. We will make a demo that will draw them relatively big, and you can read here the specifics of the mechanism.
Catch 2: since we are drawing 2D images, the z-buffer is, well, inactive. DirectX considers 2D to be mostly UI elements, so it does not think that it should be occluded by much. This means that the effect will be drawn with the order you draw it, and may appear in front of far away objects. Workarounds: 1) billboarding, creating a square with the texture applied and rendering that in 3D space, facing the camera of course. This is slower than point sprites. 2) off screen z-buffer. Using a separate surface to store the z-buffer and checking against that one. There are two issues: first off, you cannot obtain the z-buffer from the device, that is something not entirely solved even in later DirectX versions. Second, it means you will have to do a reduced render of all objects one second time. Reduced because this time you do not care about color, transparency may require a full render, but that will not be much of an issue as far as code goes.
Concerning the second solution, off-screen rendering, you have two further measures that reduce the cost: 1) first rendering, then occluding. You first render the entire particle system, and then you do the z-buffer check. This assures that the maximum number of checks is equal to the number of pixels on the screen, and essentially cuts out extra checks due to overlaps. 2) downsampled z-buffer. Essentially instead of taking a full image of the current render, you take a scaled down version, the scale is custom. This means you have to do less rendering in the second pass. The checks may or may not change, depending on your implementation, in general, since we directly access the pixel we are interested in, it should not affect the depth check. Then there are two cases of this mplementation, if you only use the downsampled z-buffer you risk having some jagged edges, because the occlusion will seem pixilated compared to the full scale image. This may be an important issue. The other approach is to use it to check massive occlusion, that is, check if there are regions/particles that are not obstructed at all, so they can be directly drawn (mostly when close up) and if there are others that are entirely hidden (for example, in an action game with closed spaces, an explosion in the next room has no reason to be drawn at all, as the wall is obstructing the view). Note also that this can refer to particles on their own, not the entire system, as when viewing an explosion through a door that’s not right in front of you, a big part of it is likely to be well out of sight, again, it can be a very big gain.
The z-buffer, as we have most probably said in the past, holds the depth of every pixel, z refers to the z-axis, the one going into the screen since x and y are width and height.
If you want to read more on this, relative passages from GPU Gems are available online for free on the NVIDIA website.
We will not work on these methods in this tutorial at all, since they involve some work that is enough to fill a tutorial on it’s own (like off-screen rendering for acquisition of the z-buffer), but some practical methods of working with this would be rendering the particle right after the object that it’s attached to, or right before, depending on their direction, that way the aforementioned issues are limited only to it’s owning object. By owning object I mean, for example, the car whose exhaust is the particle system in question, or the plane whose fire is the particle system.
Now let’s get down to business. First off, the way we generally draw particle systems with point sprites is, as you may have guessed, a vertex buffer. We start working in 3Dheader. Declare an IDirect3DVertexBuffer9* object to store their positions. You will also need a texture to draw, so create an LPDIRECT3DTEXTURE9 object as well. I also declared an integer called particleCount which holds the number of particles. I used 20.
Note that some people create a custom vertex format, I have done that in the code, but essentially it is not needed. Instead I load it with D3DXVector3 data.
In init_graphics create a vertex buffer (device->CreateVertexBuffer(…) ) with a size of 20 times either your custom vertex struct’s size, or a vector’s. The flags should be D3DUSAGE_DYNAMIC so you can update it in every frame, D3DUSAGE_WRITEONLY so you can write on it (obviously DirectX can read it, otherwise there’s no point in writing, so don’t worry about the “only” part), and D3DUSAGE_POINTS, because, well, that’s what we’re using. Use you custom FVF and then, as usual, D3DPOOL_DEFAULT. Pass the location of the buffer and NULL to the last argument, as we did in the previous tutorials.
Next we have to load the texture, that’s an easy one, use D3DXCreateTextureFromFile(device, L”name”, &texture) as in the previous tutorial. If this fails, use the if() sequence from the previous tutorials to see what’s wrong, D3DXERR_INVALIDDATA is probably an issue with the name, this may be either that the file does not exist, or it could even be an issue with the encoding (remember the A2W function we used to automatically load the mesh textures), though the last one is improbably if you directly give it. Remember the uppercase L in front of a string directly given makes it an long character string, it is needed here. If the error is D3DXERR_INVALIDCALL then there’s something wrong with the pointer levels on the texture, check if the declaration and usage complies with the previous tutorials, it’s not easy to get intuitive with pointers, especially when you don’t know exactly how they’re used by third party functions.
Now let’s move on to D3DLoader.h. The first thing I do is declare two D3DXVECTOR3 arrays, particlePoints[] and particleSpeeds. In the first just copy-paste D3DXVECTOR3(0, 0, 0) twenty times, separated by comma and preferably each on a separate line. In the second you need different speeds on each one, actually different directions. I just started changing zeroes to 1 as if it were a sequence of binary numbers, when I ran out of different binary numbers, I upped the stakes by using -1 as well. You need different directions because otherwise you’ll all be on the same spot and it will look like only one sprite, and probably very solid at that.
Create a new function called renderParticles(), well you can call it whatever you like actually. If you move on to make a game, you’re probably also gonna pass the particle item/struct/data as a parameter, for now we’ll work with the global variable for simplicity’s sake. In this function we’re going to have a hell of a party. First off we add a for(;;) loop that loops from 0 to particleCount. Inside the loop we increase particlePoints[i] by particleSpeeds[i].
After the loop we create a void* pointer, I call it data, since it’s the pointer that points to the buffer’s data. Lock the buffer (offset = 0, particleCount*siezof(/*whatever you used before*/), &data, NULL) and copy the memory with memcpy. The parameters will be our void pointer, particlePoints (without brackets) and sizeof(particlePoints). Now unlock the buffer.
Set the texture 0 to our particle texture (device->SetTexture). Now we will set a number of render states, mostly to handle opacity. Experiment a bit to see which one does what, here is the list as I have it in my code (some may be overkill, but just to be sure...)
D3DRS_SRCBLEND – D3DBLEND_SRCCOLOR
D3DRS_DESTBLEND – D3DBLEND_INVSRCCOLOR
These two set the blending factors, essentially they modify how the alpha channel is applied. Messing with the blend modes can have interesting effects, for example exchanging the two above modes you can sometimes make particle loop emissive.
D3DRS_ALPHABLENDENABLE – TRUE
This enables alpha blending, i.e. transparency.
D3DRS_ZWRITEENABLE – TRUE
This one’s one of those overkill things, D3D should be writing to the z buffer without us telling it to.
D3DRS_POINTSPRITEENABLE – TRUE
This switched between drawing just points on the screen and drawing sprites.
D3DRS_POINTSCALEENABLE – TRUE
This sets whether or not we will use the scale passed either by hand or as parameter on the sprites (here we enable it and pass it by hand).
D3DRS_POINTSIZE – *((DWORD*)&(scale10))
This is supposed to pass the size of the points, but I’ll be honest with you, few people around the world managed to implement point sprites this way and get this to work. I am still waiting for feedback from stackoverflow on this.
D3DRS_POINTSCALE_A, D3DRS_POINTSCALE_B and D3DRS_POINTSCALE_C – 0, 0, 1
In theory these are the values given. What I saw was that anything above 0.999999997f would make the sprites extremely small, while if all were equal or below that, they appear normally, but I don’t think they comply to any scaling whatsoever. This is pretty much the same issue as the above.
Furthermore some suggest you set D3DRS_POINTSIZE_MIN to 0.0f and it’s MAX counterpart to 9999.0f, when I did that, I didn’t get any sprites rendered whatsoever, and the book I follow is getting lazy and explains less and less by the chapter – thankfully other than DirectInput and DirectAudio there’s little more we need from it, and while reading the next one I will update the tutorials with any extra information.
Now we set the stream source to our particleBuffer, stream number will be 0 (we can use others and avoid loading every so often), offset 0 and the step will be sizeof(D3DXVECTOR), unless you used your custom vertex format.
Finally we draw the primitive (again the command should be easy to imagine) as a D3DPT_POINTLIST, we start at 0 and we continue with particleCount primitives (hint: I tell you the parameters in plain speech so you can get some intuition while working with DirectX).
Now we return D3DRS_POINTSPRITEENABLE and D3DRS_ALPHABLENDENABLE to FALSE, and you can also return D3DRS_POINTSCALEENABLE to FALSE too.
You can work out which ones only need be enabled once and which need toggling every time for practice.
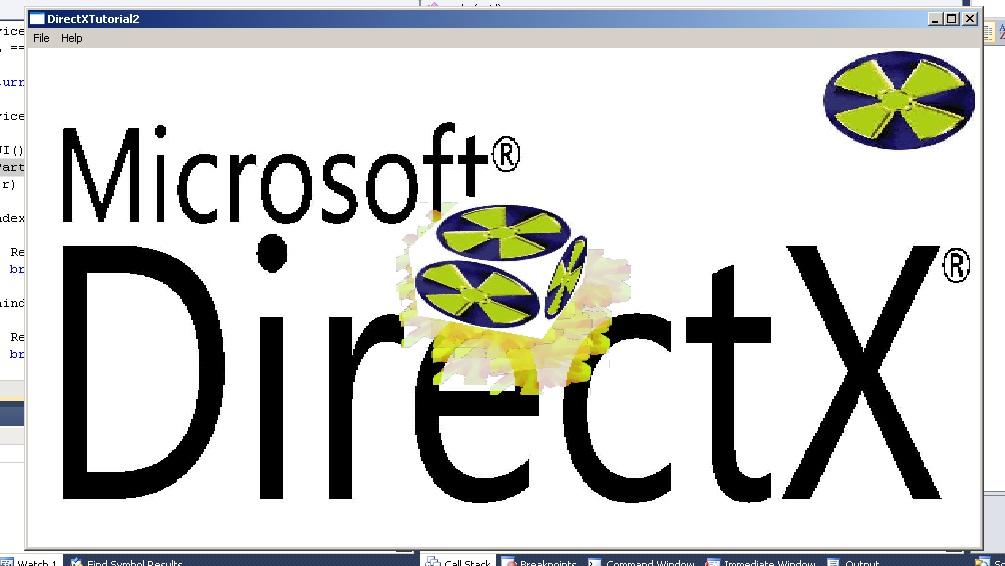
Now let’s render those sprites, well, we just call the function actually. Call it before render3D to make them appear behind the model, or after to make them appear in front, this matters due to the issues described above, if/when you implement a workaround the order of the operations will not matter. If you draw them behind, you should see such a result:
We have finally finished a book’s worth of DirectX 9 graphics programming. The next two tutorials will be about DirectInput and DirectSound, and then a new tutorial series will dive deeper into DirectX programming, with methods like the workarounds presented above, shader programming, animation and so on.
You can get the project here, feel free to modify as necessary.
The particle texture which has transparency was created with GIMP, the GNU Image Manipulation Utility, which is a more-than-decent free alternative to Photoshop – though as we has said in previous tutorials, there are good reasons why commercial products cost what they cost and even better ones for why people do buy them.
Array declarations (in case you get lazy):
D3DXVECTOR3 particlePoints[] = {
D3DXVECTOR3(0, 0, 0),
D3DXVECTOR3(0, 0, 0),
D3DXVECTOR3(0, 0, 0),
D3DXVECTOR3(0, 0, 0),
D3DXVECTOR3(0, 0, 0),
D3DXVECTOR3(0, 0, 0),
D3DXVECTOR3(0, 0, 0),
D3DXVECTOR3(0, 0, 0),
D3DXVECTOR3(0, 0, 0),
D3DXVECTOR3(0, 0, 0),
D3DXVECTOR3(0, 0, 0),
D3DXVECTOR3(0, 0, 0),
D3DXVECTOR3(0, 0, 0),
D3DXVECTOR3(0, 0, 0),
D3DXVECTOR3(0, 0, 0),
D3DXVECTOR3(0, 0, 0),
D3DXVECTOR3(0, 0, 0),
D3DXVECTOR3(0, 0, 0),
D3DXVECTOR3(0, 0, 0),
D3DXVECTOR3(0, 0, 0),
};
D3DXVECTOR3 particleSpeeds[] =
{
D3DXVECTOR3(0, 0, 1),
D3DXVECTOR3(0, 1, 0),
D3DXVECTOR3(0, 1, 1),
D3DXVECTOR3(1, 0, 0),
D3DXVECTOR3(1, 0, 1),
D3DXVECTOR3(1, 1, 0),
D3DXVECTOR3(1, 1, 1),
D3DXVECTOR3(0, 0, -1),
D3DXVECTOR3(0, -1, 0),
D3DXVECTOR3(0, -1, -1),
D3DXVECTOR3(-1, 0, 0),
D3DXVECTOR3(-1, 0, -1),
D3DXVECTOR3(-1, -1, 0),
D3DXVECTOR3(-1, -1, -1),
D3DXVECTOR3(0, 0, 1),
D3DXVECTOR3(0, -1, 0),
D3DXVECTOR3(0, -1, 1),
D3DXVECTOR3(1, 0, 0),
D3DXVECTOR3(1, 0, -1),
D3DXVECTOR3(1, -1, 0),
};
The rendering function:
void renderParticles()
{
for(int i = 0; i < particleCount; i ++)
{
particlePoints[i] += particleSpeeds[i];
}
void* data;
pParticleBuffer->Lock(0, particleCount*sizeof(PARTICLE_VERTEX), &data, NULL);
memcpy(data, particlePoints, sizeof(particlePoints));
pParticleBuffer->Unlock();
pd3dDevice->SetTexture(0,pParticleTexture);
float scale_5 = 0.5f;
float scale0 = 0.0f;
float scale1 = 1.0f;
float scale10 = 50.0f;
pd3dDevice->SetRenderState(D3DRS_ALPHABLENDENABLE, TRUE);
pd3dDevice->SetRenderState(D3DRS_ZWRITEENABLE, TRUE);
pd3dDevice->SetRenderState(D3DRS_POINTSPRITEENABLE, TRUE);
pd3dDevice->SetRenderState(D3DRS_POINTSCALEENABLE, TRUE);
pd3dDevice->SetRenderState(D3DRS_POINTSIZE, *((DWORD*)&(scale10)));
//pd3dDevice->SetRenderState(D3DRS_POINTSIZE_MAX, *((DWORD*)&(scale1)));
//pd3dDevice->SetRenderState(D3DRS_POINTSIZE_MIN, *((DWORD*)&(scale0)));
pd3dDevice->SetRenderState(D3DRS_POINTSCALE_A, *((DWORD*)&(scale0)));
pd3dDevice->SetRenderState(D3DRS_POINTSCALE_B, *((DWORD*)&(scale0)));
pd3dDevice->SetRenderState(D3DRS_POINTSCALE_C, *((DWORD*)&(scale1)));
pd3dDevice->SetStreamSource(0, pParticleBuffer, 0, sizeof(D3DXVECTOR3));
pd3dDevice->DrawPrimitive(D3DPT_POINTLIST, 0, particleCount);
pd3dDevice->SetRenderState(D3DRS_POINTSPRITEENABLE, FALSE);
pd3dDevice->SetRenderState(D3DRS_POINTSCALEENABLE, FALSE);
pd3dDevice->SetRenderState(D3DRS_SRCBLEND, D3DBLEND_SRCCOLOR);
pd3dDevice->SetRenderState(D3DRS_DESTBLEND, D3DBLEND_INVSRCCOLOR);
pd3dDevice->SetRenderState(D3DRS_ALPHABLENDENABLE, FALSE);
}