create and style HTML audio element with custom controls
HTML5 brings a very useful standard for playing multimedia (audio and video) files on a webpage. Before that, the only way to play audio files was to use or create a plug-in like flash. Comparing this standard and flash player, anyone can see the performance boost and the benefits of the new HTML5 standard.
This article focuses on how to create a custom audio element using Javascript and style it with css however you like without the use of any external library (i.e jQuery) or plugin. The player will consist of a play/stop button, a volume controller and an area to display information about the current playing song. Javascript will allow us to add some logic to our buttons and controls and change the DOM whenever it has to.
Firstly let’s create the HTML which will hold elements that we will use to style later using CSS.
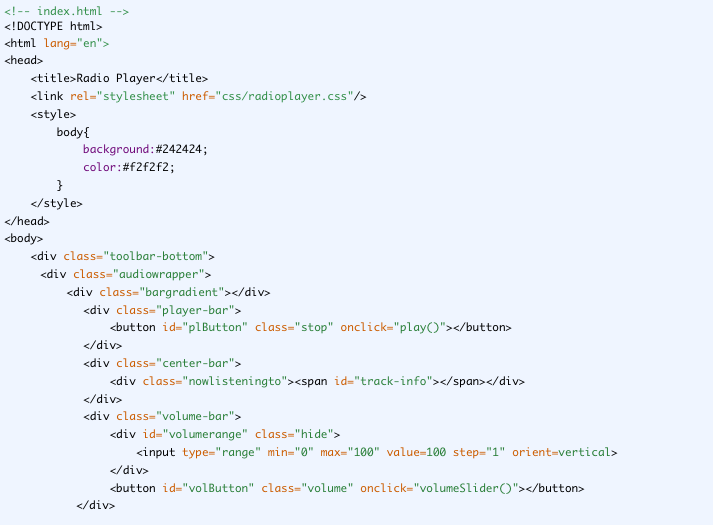
This simple HTML above creates the DOM elements that we need. Seeing the class names we used on the DIV elements, we can understand that the player is going to be at the bottom of the page in a toolbar. Inside the player we define three separate sections where each one will hold different parts of the audio player. Starting from the left (player-bar), there will be the play/stop button, at the center (center-bar) we will show information for the current audio track and finally on the right side (volume-bar) we will show the volume slider, so the user can control the audio volume.
Let’s style the above elements and see how our player looks like! We will create a CSS file titled ‘radioplayer.css’ (or the name that you defined at the top of your html).
/* radioplayer.css */
.toolbar-bottom{
position:fixed;
bottom:0;
left:0;
width:100%;
height:40px;
background:#FC2727;
-webkit-background-clip: padding-box;
background-clip: padding-box;
font-weight: normal;
min-width: 1em;
}
.bargradient{
background-image: linear-gradient(to bottom, rgba(255, 255, 255, 0.125) 5%, rgba(255, 255, 255, 0.125) 45%, rgba(255, 255, 255, 0.15) 50%, rgba(0, 0, 0, 0.1) 51%, rgba(0, 0, 0, 0.1) 95%);
height: 100%;
left: 0;
top: 0;
position: absolute;
width: 100%;
}
.audiowrapper{
display:table;
}
.player-bar{
display: table-cell;
border-right:1px solid #E00000;
min-width: 2.8em;
}
.player-bar button{
border: none;
background-position: center;
position: absolute;
top:5px;
left: 7px;
height: 30px;
width: 30px;
cursor:pointer;
}
.volume-bar{
min-width: 2.8em;
display:table-cell;
}
.volume-bar button{
border: none;
background-position: center;
position: absolute;
top:7px;
right: 7px;
height: 30px;
width: 30px;
cursor:pointer;
}
.player-bar:hover, .volume-bar:hover{
background:#E00000;
}
#volumerange{
bottom: 45px;
height: 100px;
position: absolute;
right: 0;
width: 40px;
}
.visible{
display:block;
}
.hide{
display:none;
}
input[type='range'] {
-webkit-appearance: none;
border-radius: 3px;
background-color: #fff;
height: 100px;
width:10px;
vertical-align: middle;
}
input[type='range']::-moz-range-track {
background-color: #fff;
}
input[type='range']::-moz-range-thumb {
-moz-appearance: none;
border-radius: 20px;
background-color: #FC2727;
border-color: #E22323;
height: 20px;
width: 20px;
}
.center-bar{
width:100%;
height:40px;
padding-left: 0.75em;
padding-right: 0.75em;
display:table-cell;
text-align:center;
border-right:1px solid #E00000;
}
.play{
background: url("play.png") no-repeat;
}
.stop{
background: url("stop.png") no-repeat;
}
.volume{
background: url("volume.png") no-repeat;
}
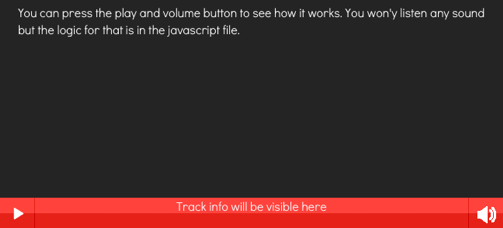
This CSS styles our audio player’s elements as we want. So lets see how is that looks like:
Saturday, March 21, 2015
By Jc
The last part is to create the logic of our audio player. To do so, we will create a JavaScript file and import it at the bottom of our HTML file. The code for this file is the one bellow:
var radio = new Audio();
radio.src = 'http://www.yourStreamingURLhere:8000';
radio.volume = 1;
radio.play();
var pButton = document.getElementById('plButton'); // play button
var volumeslider = document.querySelector('input');
volumeslider.addEventListener('input', function () {
volume(volumeslider.value);
}, false);
//Play and Stop
function play() {
// start music
if (radio.paused) {
radio.play();
// remove play, add stop
pButton.className = "";
pButton.className = "stop";
} else { // stop music and reset audio object
radio.pause();
radio = new Audio();
radio.src = 'http://www.yourStreamingURLhere:8000';
// remove stop, add play
pButton.className = "";
pButton.className = "play";
}
}
function volume(value){
volumeslider.value = value;
radio.volume= value/100;
}
function volumeSlider(){
var volumerange = document.getElementById('volumerange');
var className = volumerange.className;
if ( ~className.indexOf('visible') ) {
volumerange.className = 'hide';
} else {
volumerange.className = 'visible';
}
}
var xmlhttp=new XMLHttpRequest();
//Uncomment these lines below to make ‘nowplaying’ self invoking
//(
function nowplaying(){
xmlhttp.open("POST","Your Server PHP URL to fetch info about now playing track",true);
xmlhttp.send();
xmlhttp.onreadystatechange=function()
{
if (xmlhttp.readyState==4 && xmlhttp.status==200)
{
document.getElementById("track-info").innerHTML=xmlhttp.responseText;
}
}
setTimeout(nowplaying, 2000);
}
//)();
The above Javascript file has all the logic our audio player needs to be functional. The file consists of four functions. The first one is called ‘play()’ and what it does is to control the play/stop button. When the audio is not playing, then the function starts to play the audio and changes the class name of the button to show the stop icon. While the player is playing, if we press the stop button then it resets and recreates the audio element and changes the class name of the button to show the play icon.
The second function is the ‘volume()’ function, which accepts the input from the range slider and sets the volume accordingly. The max value of the range slider is 100 and the min is 0, but the volume of the audio element can take values between 0 and 1. Thats why we have to convert the coming value to a value between [0,1].
The third function controls the behavior of the div that holds the slider when the volume button is clicked. If the volume slider is visible and we click the button, then it hides it and shows it again if it is hidden.
The last function is a simple ajax request to the server which repeats itself every 2 seconds, in order to fetch information about the current playing song (singer - title). This function is a self invoking function but for this tutorial I commented out the wrapping lines (see comments in the code).
So, we created a fully custom and flexible audio player for our website, which you can style and customize according to your needs.
The audio element provide many events and attributes, which we can implement to our player above. These were the ones I wanted for my player but you can add more such as the duration of listening time or current track. You can read more abiut the audio tag here.

